DIY roof repair is a popular endeavor among those who wish to remain independent and take care of their home maintenance needs themselves. As with all DIY projects, however, it comes with certain risks and can be overwhelming if the proper precautions are not taken.
Fortunately, there are professional tips available that can help ensure success in any DIY roof repair project. This article will outline some dos and don’ts from experienced pros so readers can complete this task safely and efficiently.
With these helpful guidelines, anyone can apply the necessary repairs to their own roofs without fear or confusion.
Assessing The Damage
When assessing the damage to a roof, it is important to determine the root cause of the problem.
Common causes of roof deterioration include weather conditions such as precipitation or wind which can lead to issues such as leaks and missing shingles in addition to more permanent damage caused by improper installation or aging materials.
It is also necessary to consider any structural changes that may have occurred over time due to natural settling or construction errors.
Once an accurate assessment has been made, homeowners should take preventive measures if needed to avoid further damage from occurring.
Steps such as sealing seams around vents and chimneys, applying waterproof sealants, replacing flashing on skylights, and clearing away debris are all effective ways of protecting a roof against future problems.
In some cases, professional help may be required for more complex repairs like re-roofing sections of the home that are beyond basic DIY repair capabilities.
Taking action now can save money in the long run by helping prevent costly repairs down the road.
Gathering The Right Tools
The right tools can make all the difference when it comes to DIY roof repair. Making a list of items that are needed before starting is an important first step in any project, and repairing a roof is no different.
Necessary materials include safety equipment such as goggles, gloves, and appropriate clothing; basic hand tools like hammers and chisels; and specialized supplies for the particular type of work being performed. For instance, if patching shingles or replacing flashing requires staples be used, then investing in heavier-duty staplers would be recommended.
Additionally, using caulking guns is also essential for applying sealants around vents and chimneys. For larger projects involving the removal or replacement of sections of the roof, renting scaffolding may be necessary to ensure safe access to higher areas. Gathering the proper tools ensures a job done safely and correctly with minimal time wasted on improvising solutions.
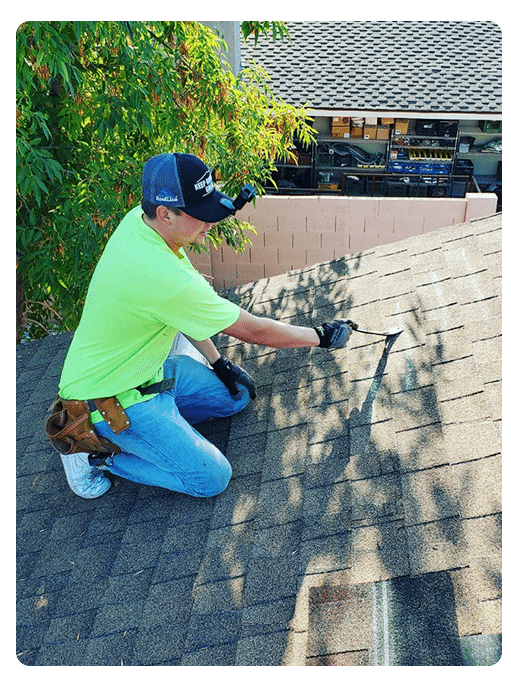
Understanding The Safety Protocols
It is important to have the proper tools for any roof repair project. However, it is equally as important to understand safety protocols when working on a roof. Knowing and following these rules can help ensure that your repairs are successful and safe for you and anyone else who might be helping out with the project.
It’s imperative that caution is taken when walking or standing on a rooftop, even if there are no visible issues present. Any loose shingles or tiles should be immediately replaced in order to prevent further damage from occurring.
Additionally, wearing protective gear such as goggles, gloves, boots and long-sleeved shirts can help protect against possible accidents while up on the roof. Furthermore, using a ladder to reach higher areas of the roof will minimize risk of slipping or falling off the surface.
Lastly, always remember to check local building codes before starting work so that all regulations are met throughout the process. All said, taking precautionary measures will greatly help in reducing injuries during any kind of DIY roof maintenance projects.
Locating The Source Of The Leak
It is important to locate the source of a roof leak before any repairs are attempted in order to determine the best method for repair.
Locate where water is entering the home and identify which section of the roof needs attention.
The most common places that water can enter include around chimneys, plumbing vents, dormers, valleys or eaves.
When inspecting your roof, look for signs of damage such as missing shingles, cracked tiles or warped flashing.
Pay close attention to areas with visible mold growth as well as any potential moisture sources near the affected area.
Additionally, if there is an attic present it should be inspected for signs of wetness and leaks from above.
Careful inspection of these troublesome spots will help you accurately pinpoint the location and cause of your roof’s leak so that you can make informed decisions about how to proceed with repairs.
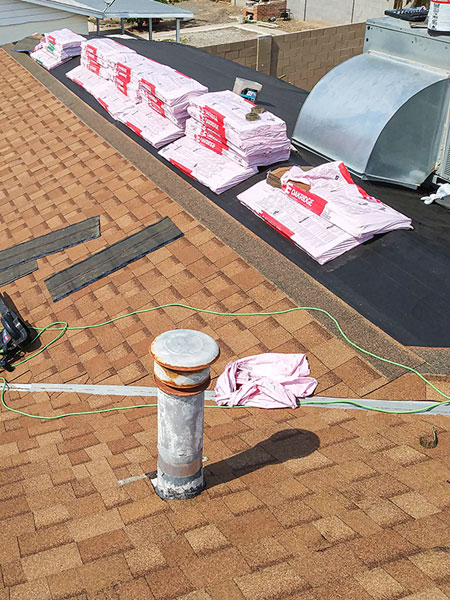
Removing And Replacing Damaged Shingles
Removing and replacing damaged shingles may seem like a daunting task, but the rewards of doing so far outweigh any potential risks.
A visual representation of this process begins with removing the existing nails that secure the broken or cracked shingle to the roof deck. Using a pry bar, gently lift up each edge of the shingle until it is free from its underlying materials.
Then, take caution not to damage adjacent tiles when disposing of it in your waste receptacle.
It is important to replace all missing granules on new shingles before installation as they are essential for weather-proof protection against rain and sunlight.
After ensuring a clean surface area for proper adhesion, use galvanized roofing nails placed 1 inch away from each side edges and 3/4 inch away from their center points. Make sure each nail penetrates through both sides of the replacement tile into the roof’s plywood sheathing beneath it.
The result should be an airtight seal that keeps moisture out while maintaining structural integrity throughout extreme temperature changes.
Applying Sealants And Adhesives
Having removed and replaced the damaged shingles, it is now time to move on to applying sealants and adhesives. This is a crucial step in the process of DIY roof repair as these materials help protect against unpredictable weather conditions.
It is essential that you take extra care when selecting the appropriate types of sealant or adhesive for your project. The most important factor when selecting a sealant or an adhesive is its ability to resist water damage over extended periods of time.
Sealants are used where two components meet such as around flashing, vents, and chimneys; while adhesives are used to bind items together like patching up holes. Both products come in various forms from liquid solutions to silicone caulk which must be chosen based on their compatibility with existing material on the roof.
Additionally, they should adhere well even under extreme temperature changes and moisture levels. With this knowledge at hand, professionals recommend having all necessary supplies before starting any roof repair project. They also suggest reading labels carefully before making any purchase decisions so that you get exactly what you need for your particular situation.
Checking For Water Damage And Leaks After Repairs
After a DIY roof repair, it is critical to check for water damage and leaks. With proper maintenance, the lifespan of your roof can be extended by years.
It is important to regularly inspect the shingles around chimneys, skylights and other penetrations in your roof; these areas are more likely to develop problems. Additionally, any area where two pieces of flashing meet should also be inspected carefully.
It is essential to identify potential signs of water damage or leakage such as bubbling paint on interior walls, discoloration on ceilings or floors and visible moisture stains on sheathing material under the roof decking.
If you notice any of these issues during an inspection, there could be serious underlying problems with the roof that would require further investigation from a professional contractor before they become worse.
A good rule of thumb is if you see any issue whatsoever, call a certified contractor who will provide expert advice about what needs to be done and how best to address it.
Conclusion
In conclusion, the process of DIY roof repair requires careful consideration to ensure a successful outcome.
It is important to assess the damage before beginning any repairs and gather all necessary tools beforehand.
Safety protocols should be followed at all times when working on a roof.
Once the source of the leak has been located, damaged shingles must be removed and replaced with new ones.
Sealants and adhesives may also need to be applied for further protection against water damage.
Following these steps will help guarantee that one’s efforts yield positive results.
Finally, it is recommended that an inspection take place after completion of the project in order to confirm there are no leaks or other issues present.
By following these tips from roof professionals, homeowners can successfully complete their own DIY roof repair projects with ease and confidence.